An automation that works in the demo and fails quietly in week three is worse than no automation at all. Reliable workflows share the same anatomy and are built in the same careful order. This guide walks you through both, using a common example: capturing, qualifying and routing new leads.
The anatomy of a reliable workflow
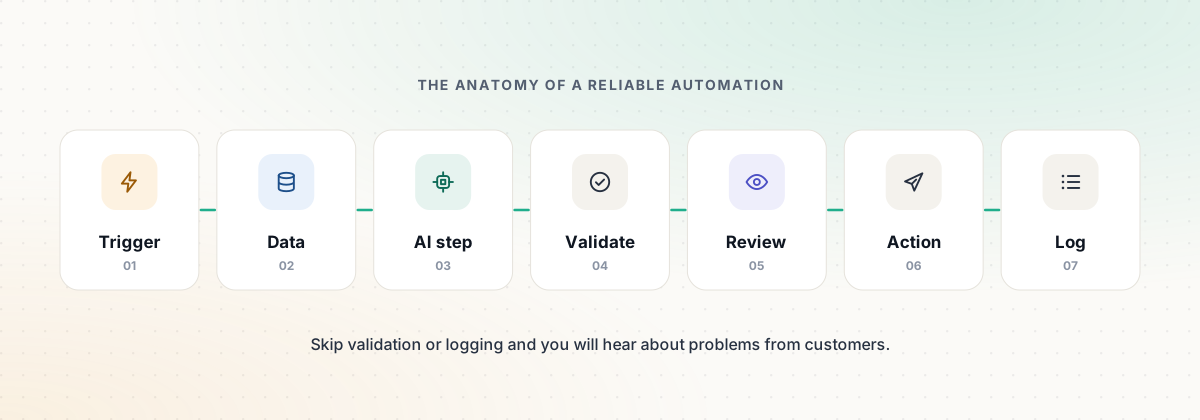
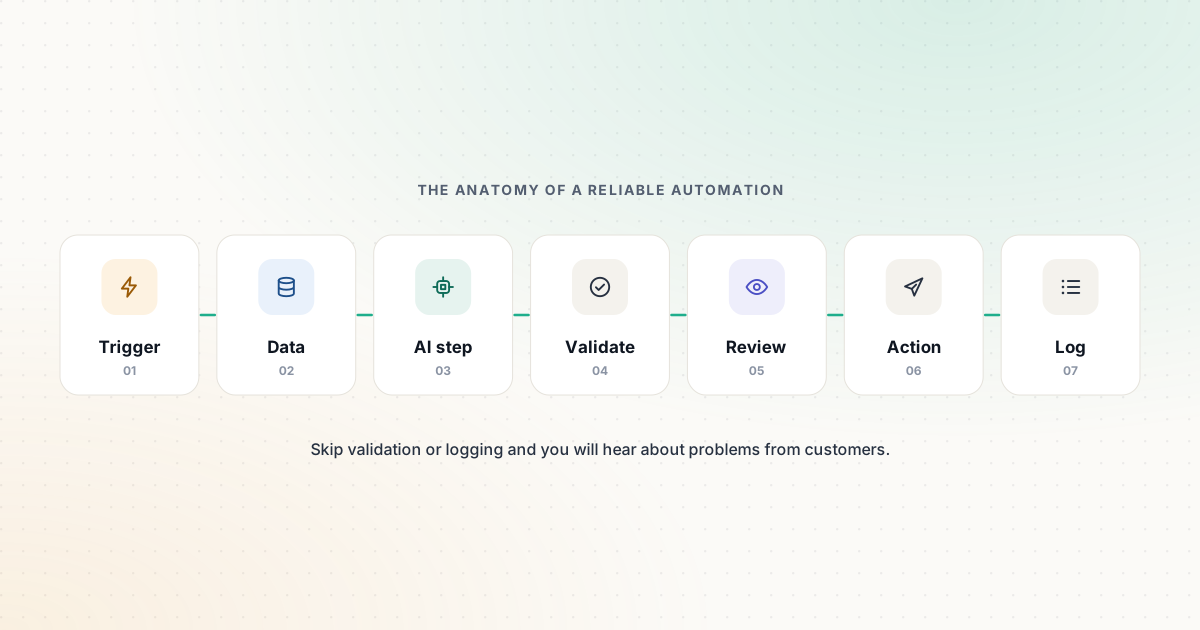
- Trigger — the event that starts the workflow: a form submission, a new email, a paid order, a schedule.
- Data — the information you collect or look up: the form fields, the customer record, the order.
- AI step (optional) — classify, extract, summarize or draft, with a strict output format.
- Validation — check that the data and the AI output are what you expect.
- Human review — where mistakes would be costly or visible to customers.
- Action — create the record, send the message, update the system.
- Log — record what happened so you can audit and debug it.
Not every workflow needs every step. But if you skip validation or logging, you’ll find out about problems from your customers.
Step 1: Choose the right process
Good candidates are frequent, rule-based and currently copy-and-paste. Lead routing, order notifications, invoice reminders and support triage are classic examples. Avoid starting with processes that change every week or depend heavily on judgment.
Step 2: Map how it works today
Write down every step a person takes today, including the exceptions: “If the company is outside our service area, we reply with a template.” These exceptions become your rules. If you can’t describe the process in writing, you can’t automate it reliably.
Step 3: Define inputs and outputs
For each step, note exactly which fields go in and what comes out. In the lead example:
- In: name, email, company, message, source (from your UTM parameters — see our UTM Builder)
- Out: CRM contact, lead category, priority, assigned owner, notification
Step 4: Choose a platform
The three most common choices differ mainly in ease of use, control and hosting:
- Zapier — the easiest start; the free plan covers two-step Zaps and 100 tasks per month, and multi-step Zaps need a paid plan.
- Make — a visual canvas with strong branching and data mapping; the free plan includes 1,000 credits per month.
- n8n — for technical teams; JavaScript or Python steps, AI agent building, and the option to self-host.
Our Zapier vs Make vs n8n comparison sets out the official details side by side.
Step 5: Build the happy path first
Build the simplest version that works for a normal input — trigger, data, action — and test it with real examples before adding anything clever.
Step 6: Add the AI step with a strict output
AI steps fail in unpredictable ways when they return free text. Ask for a constrained, machine-readable result instead:
Classify this inbound lead. Reply with JSON only, using exactly these keys:
{"category": "sales" | "partnership" | "support" | "spam",
 "priority": "high" | "normal" | "low",
 "summary": "<one sentence, max 25 words>"}
Rules: if the message mentions an existing order, use "support".
If unsure, use "normal" priority. Do not invent company details.
Lead message: """{{message}}"""
Notice the fixed set of allowed values, the explicit rules and the instruction not to invent details. Treat the lead’s message as data, not as instructions — people can and do write messages designed to manipulate AI systems (OWASP lists this as prompt injection).
Our AI Prompt Generator can help you write the instruction part clearly.
Step 7: Validate and plan fallbacks
After the AI step, check its output before acting on it:
- Is it valid JSON with the expected keys?
- Is each value one of the allowed options?
- If not, route the item to a person with a note, instead of guessing.
Also plan for the platform’s own failures: what happens if the CRM is unavailable? Most platforms offer retries and error notifications — switch them on.
Step 8: Put a human where it matters
Add a review step wherever an error would reach a customer, cost money or be hard to undo: outbound emails, discounts, refunds, deleting data. A common pattern is “AI drafts, a person approves” in your team chat or help desk.
Step 9: Test with real examples
Run 20 or so real (anonymized) inputs through the workflow, including messy ones: empty fields, very long messages, non-English text, obvious spam. Fix each failure and re-run the whole set.
Step 10: Monitor and document
- Log every run with its input, the AI output and the action taken.
- Review a sample weekly for the first month.
- Write a one-page description: purpose, owner, trigger, steps, rules and how to switch it off.
Documentation matters more than it seems. Automations outlive the memory of whoever built them.
Common mistakes
- Automating a broken process. Fix the process first; automation makes problems happen faster.
- No owner. Every workflow needs a named person who gets the error alerts.
- Free-text AI output feeding other steps. Always constrain and validate.
- Removing the human step too early. Wait until you have weeks of clean results.
- Ignoring usage limits. Tasks, credits and executions add up; check your plan’s limits as volume grows.
Ready to build? Start from the lead generation workflow, which implements this example end to end, or copy a starter from our business automation templates.
Sources and further reading
We link to official documentation and primary sources. Product details change — check the source before relying on a specific limit or price.
- Zapier pricing (plan limits) zapier.com
- Make pricing make.com
- n8n pricing n8n.io
- n8n homepage (features) n8n.io
- OWASP Top 10 for LLM Applications 2025 genai.owasp.org